Installing VJSP in VS Code
This document provides the complete process for installing and configuring VJSP in VS Code (version 1.84 and above) on Windows 10/11 or macOS systems.
VJSP leverages advanced artificial intelligence technology to provide intelligent code generation, context-aware completion, requirement understanding, and other capabilities to assist you in efficient development.
📌 Prerequisites
- Operating System: Windows 10/11 or macOS
- Development Environment: VS Code 1.84 or later installed
Step 1: Install VJSP
It is recommended to install online via the VS Code Extension Marketplace; you can also install manually using the .vsix installation package.
Method 1: Install via the Extension Marketplace (Recommended)
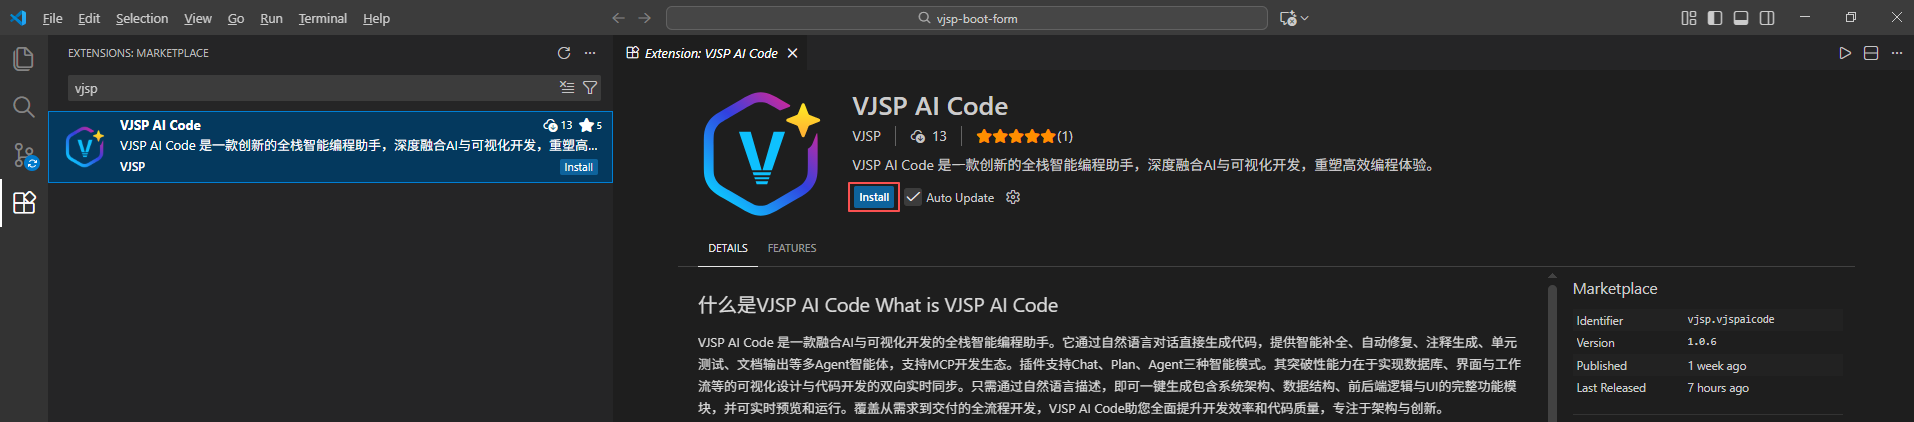
Open VS Code, click the Extensions icon on the left (or press
Ctrl+Shift+X/Cmd+Shift+X).Type
VJSPin the search box.Locate the VJSP plugin in the search results and click the Install button to complete the installation.
✅ Why it's recommended: Simple operation, automatic updates, and a secure source.
Method 2: Offline Installation via VSIX Package
Download the latest version of the VJSP plugin installation package (
.vsixformat):
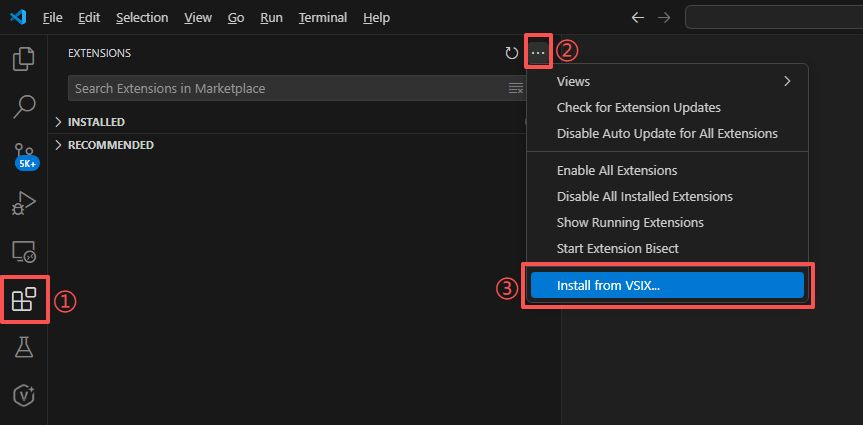
⬇ Visit VJSP Download PageOpen VS Code, click the Extensions icon on the left, then click the ⋯ (More Actions) button in the top right.
Select Install from VSIX... from the dropdown menu.
Browse and select the downloaded
.vsixfile, then click Install to start installation.After installation is complete, you must restart VS Code.
Step 2: Log in and Enable VJSP
After installation, you need to complete account authentication to unlock all AI features. Follow these steps:
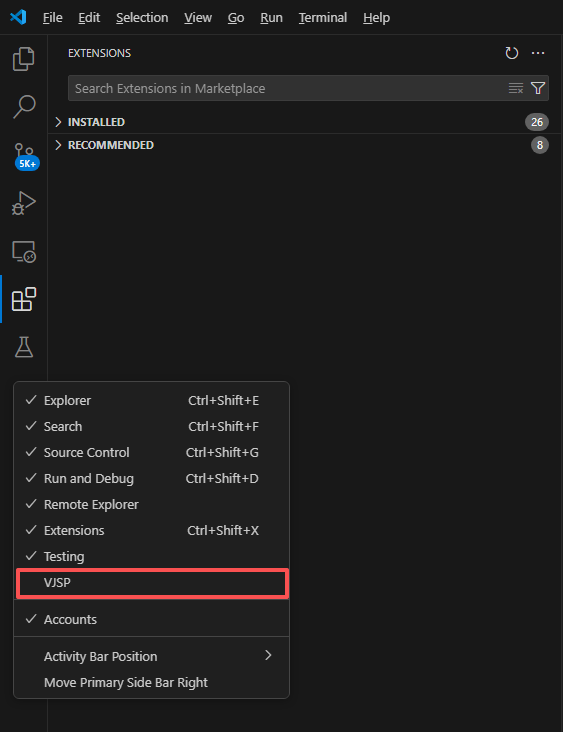
Open the VJSP Panel:
Find and click the VJSP icon in the VS Code sidebar.
If the icon is not displayed, right-click in the blank area of the sidebar and check "VJSP" to enable the entry.
Start Login Process:
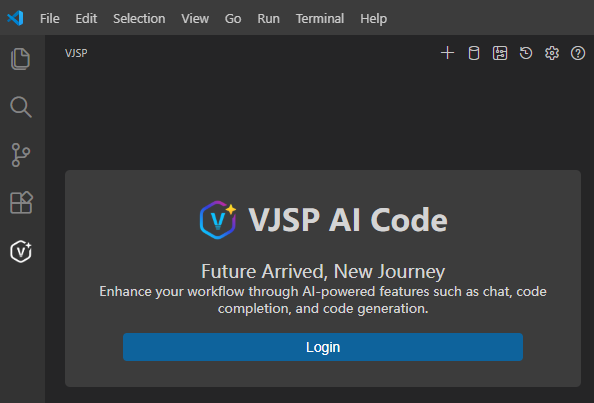
- In the VJSP panel, click the "Log In" button.
- In the VJSP panel, click the "Log In" button.
Authorization and Redirect:
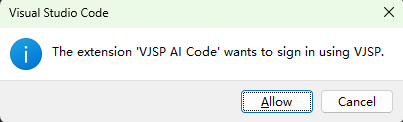
- VS Code will pop up a security prompt asking whether to allow VJSP to perform login operations. Click "Allow" to confirm.
- VS Code will pop up a security prompt asking whether to allow VJSP to perform login operations. Click "Allow" to confirm.
Complete Identity Verification:
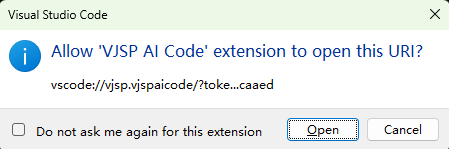
The system will automatically redirect to the browser. Complete the VJSP account login on the page.

After successful login, the page will automatically prompt for authorization confirmation. Click 【Open VS Code】 to complete the association.
Return to VS Code and Start Using:
After returning to VS Code, a confirmation pop-up will appear. Click 【Open】 to complete the final authorization.
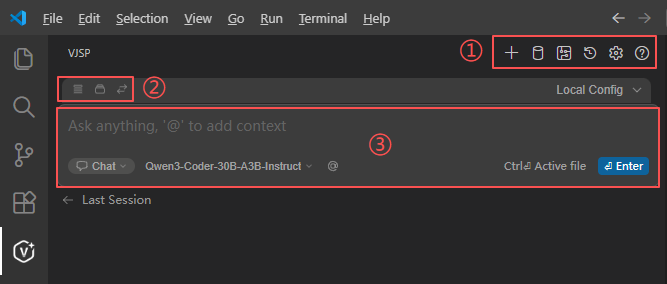
The login is now complete. The VJSP panel will display your account information and all AI function entries, and you can start using it normally.
🎉 Congratulations! You Have Successfully Enabled VJSP
Now you can experience:
- Generating complete functional modules with a single sentence
- Intelligent completion and code optimization suggestions
- Context-aware error fixing
- Real-time conversation with your dedicated AI programming assistant
🚀 Let AI become your most默契 programming partner — coding has never been so efficient.
If you encounter any issues, please refer to the FAQ or Contact Us.