Installing VJSP in IntelliJ IDEA
This document provides the complete process for installing and configuring VJSP in IntelliJ IDEA (version 2024.3 and above) on Windows 10/11 or macOS systems.
VJSP leverages advanced artificial intelligence technology to provide intelligent code generation, context-aware completion, requirement understanding, and other capabilities to assist you in efficient development.
📌 Prerequisites
- Operating System: Windows 10/11 or macOS
- Development Environment: IntelliJ IDEA 2024.3 or later installed
Step 1: Install VJSP
It is recommended to install online via the JetBrains plugin marketplace; if offline deployment is needed, you can also manually install using a local ZIP package.
Method 1: Install via Plugin Marketplace (Recommended)
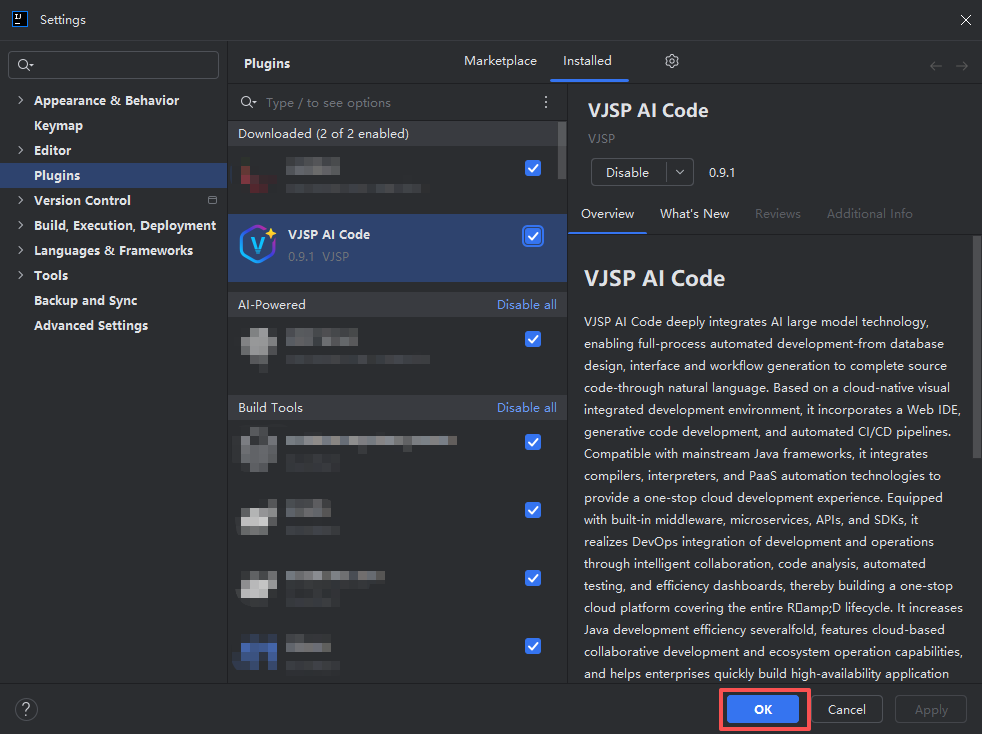
Launch IntelliJ IDEA, click Settings > Plugins (on macOS, IntelliJ IDEA > Preferences), and enter the plugin settings interface.
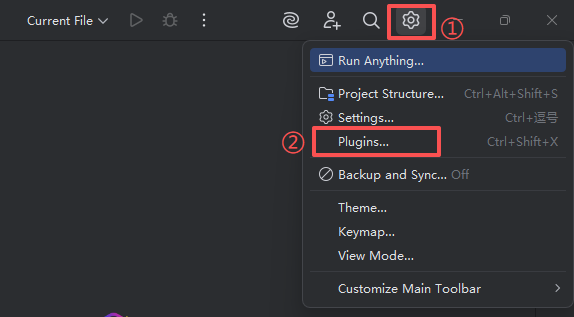
Click Plugins in the left navigation bar, and enter
VJSPin the search box.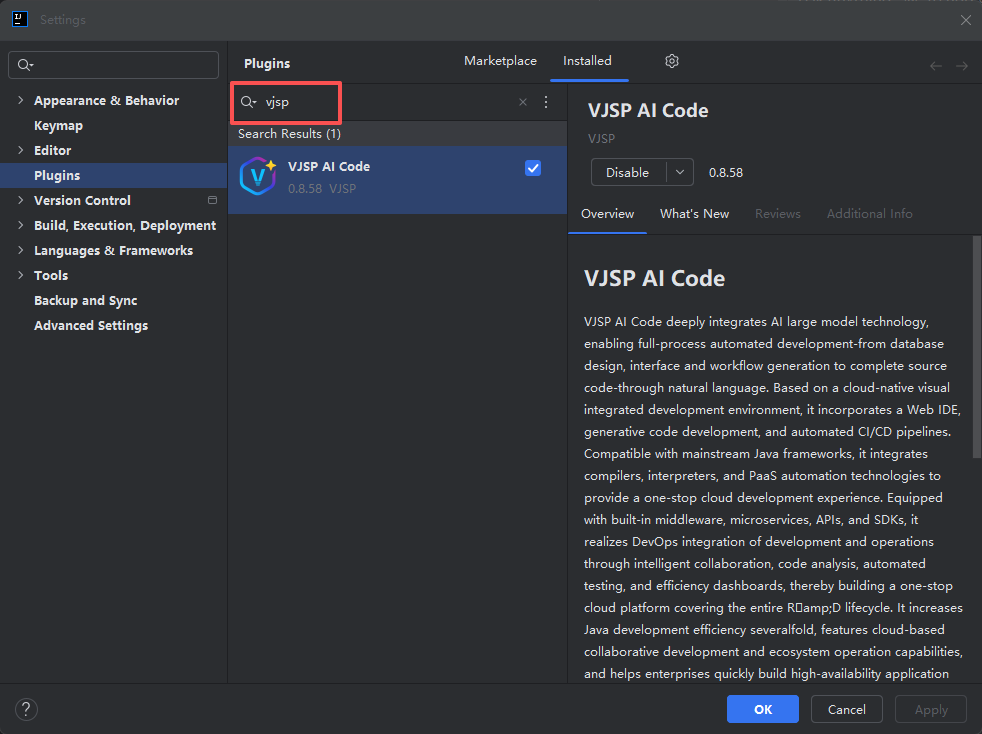
Find the VJSP plugin in the search results, and click the Install button to start downloading and automatically install.
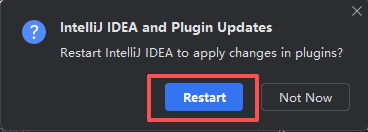
After installation is complete, the IDE will prompt for a restart. Please click Restart IDE to activate the plugin.
Method 2: Manual Installation via Local ZIP Package
Download the latest version of the VJSP plugin installation package (ZIP format): ⬇ Visit VJSP Download Page
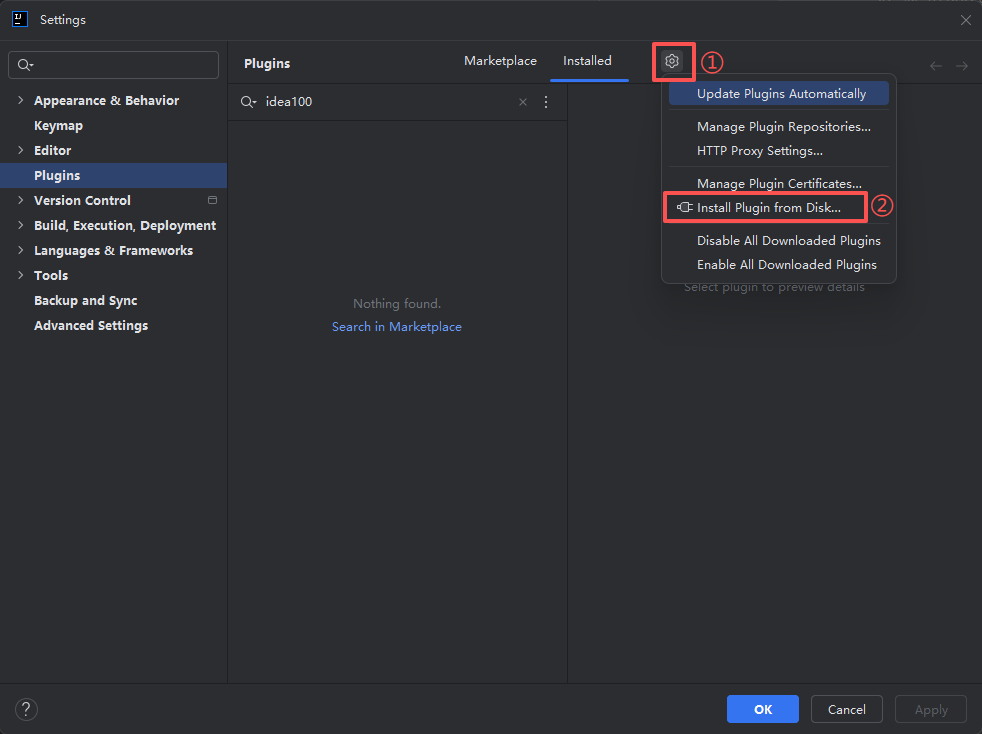
Open IntelliJ IDEA, go to Settings > Plugins.
Click the ⚙️ settings icon and select Install Plugin from Disk....
Browse and select the downloaded
.zipfile, then click OK to start installation.After installation is complete:
- First-time installation: Click OK, then restart the IDE.
- Overwrite update: Directly click Restart IDE to take effect.
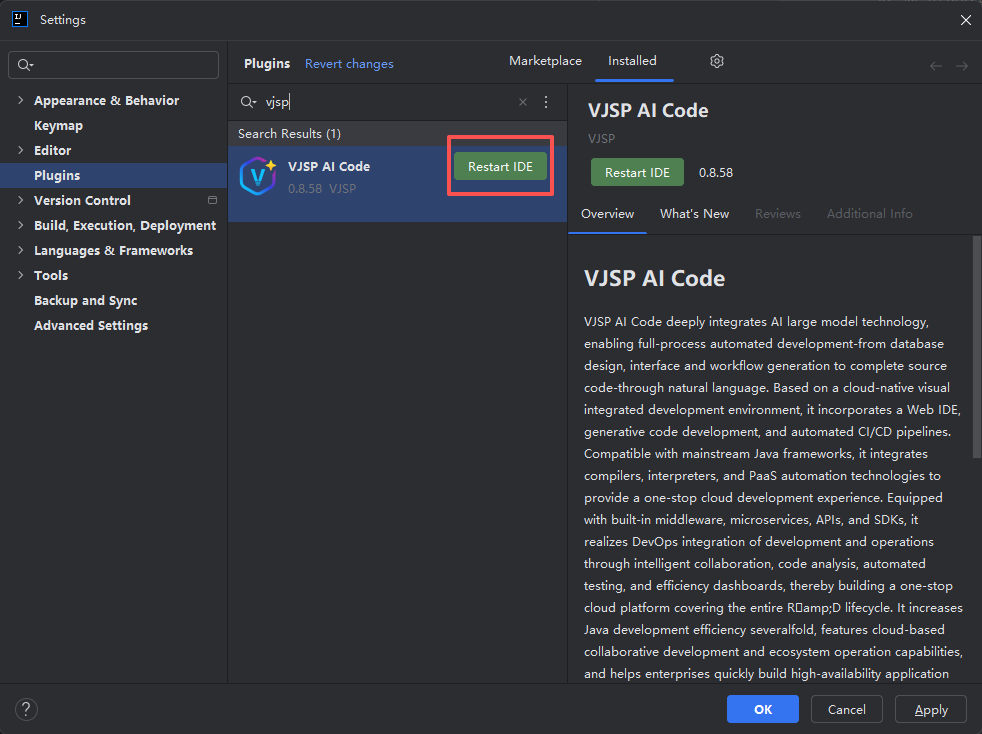
- First-time installation: Click OK, then restart the IDE.
Step 2: Log in to Your VJSP Account
After installation, you need to complete account authentication to use all AI features.
Open IntelliJ IDEA, find the VJSP icon on the right sidebar, and click to expand the plugin control panel.
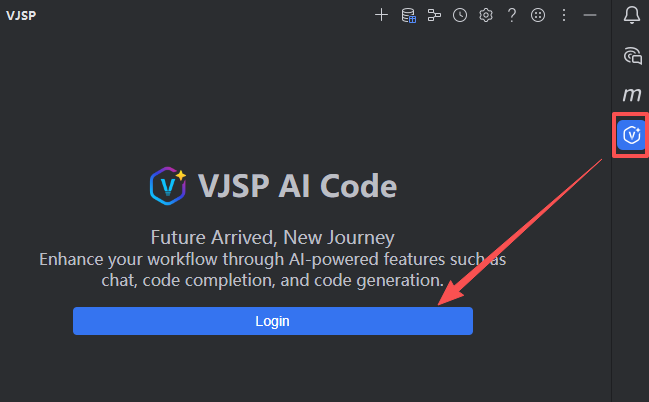
Click the Log in button at the top of the control panel to officially start the login process.
The system will automatically open the VJSP login page in your default browser.

After completing the account login in the browser, you will be automatically redirected to the authorization page. Click the 【Agree】 button.
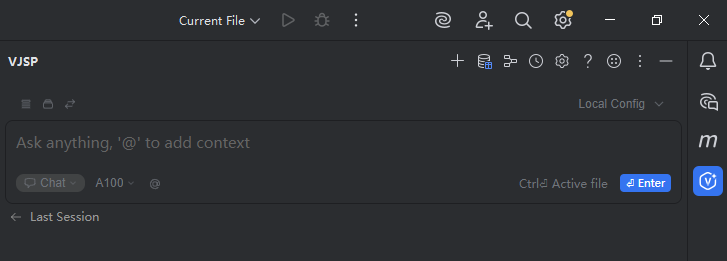
Return to the IntelliJ IDEA interface. The VJSP control panel will automatically display your account information, and you can now normally use all AI features.
🎉 Congratulations! You Have Successfully Enabled VJSP
Now you can experience AI-driven:
- Intelligent code generation
- Context-aware completion
- Automatic defect repair
- One-click transformation from requirements to code
🚀 Embark on a New Era of Intelligent Coding — Let AI be your most capable programming partner.
If you encounter any issues, please refer to the FAQ or Contact Us.