Installing the VJSP Plugin in VS Code
This guide explains how to install and activate the VJSP plugin in Visual Studio Code.
Prerequisites
- Operating System: Windows 10/11, macOS, or UOS
- Development Environment: VS Code version 1.82 or later must be installed
Installing the VJSP Plugin
Offline Installation via VSIX Package
Download the latest VJSP plugin package (
.vsixformat):
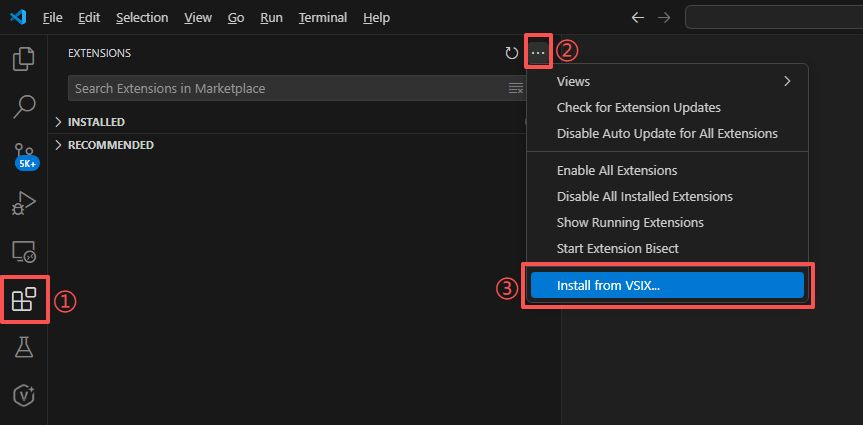
⬇ Go to VJSP Download PageOpen VS Code, click the Extensions icon on the left sidebar, then click the ⋯ (More Actions) button in the top-right corner of the Extensions panel.
From the dropdown menu, select Install from VSIX...
Browse to and select the downloaded
.vsixfile, then click Install to begin installation.After installation completes, restart VS Code to activate the plugin.
Logging In and Activating the VJSP Plugin
After installation, you must complete account authentication to unlock all AI features.
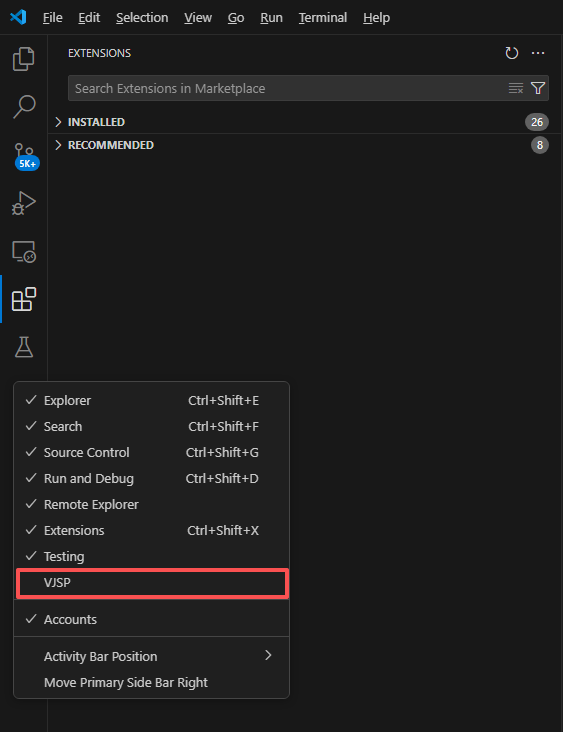
Open the VJSP Panel:
- Click the VJSP icon in the VS Code sidebar.
- If the icon is not visible, right-click any blank area in the sidebar and check “VJSP” to enable it.
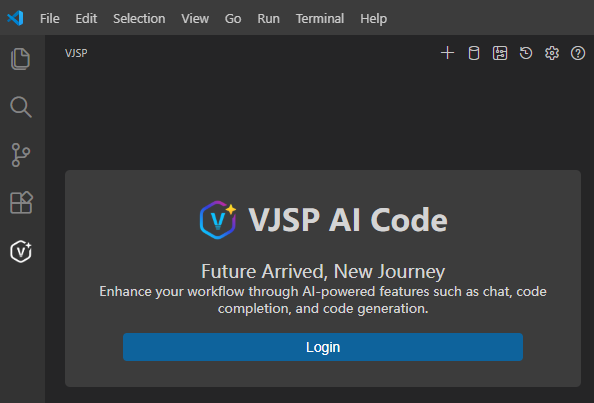
Start the Login Process:
- In the VJSP panel, click the Log in button.
- In the VJSP panel, click the Log in button.
Authorize the Login Request:
- VS Code will display a security prompt asking whether to allow VJSP to initiate login. Click “Allow” to proceed.
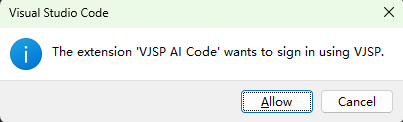
- VS Code will display a security prompt asking whether to allow VJSP to initiate login. Click “Allow” to proceed.
Complete Authentication in Browser:
- Your default browser will open automatically to the VJSP login page. Complete your account login there.

- After successful login, you’ll see an authorization confirmation page—click 【Open Visual Studio Code】 to link your session.

- Your default browser will open automatically to the VJSP login page. Complete your account login there.
Return to VS Code and Finish Setup:
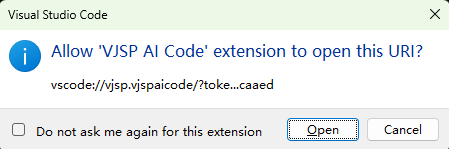
- Switch back to VS Code. A confirmation popup will appear—click 【Open】 to finalize the authorization.
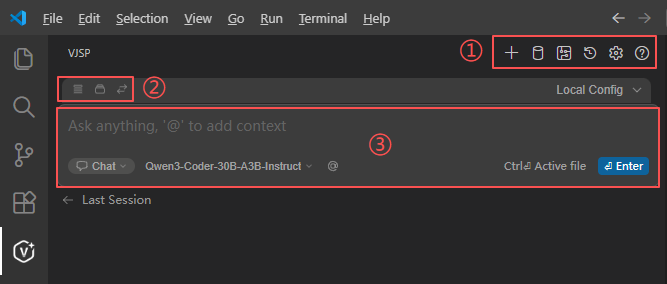
- Once complete, the VJSP panel will display your account information and provide access to all AI features.
- Switch back to VS Code. A confirmation popup will appear—click 【Open】 to finalize the authorization.
The plugin is now ready—you can start conversing with VJSP and enjoy intelligent coding assistance.