Using Agents
You can obtain and use agents in multiple ways to meet diverse AI interaction needs across different scenarios. This guide introduces three primary methods for acquiring and using agents:
- Using Public Agents — Quickly try out agents published on the website
- Creating and Using Cloud-Based Agents — Build private agents for your exclusive use
- Configuring Local Agents — Create and manage agents directly within your local IDE plugin
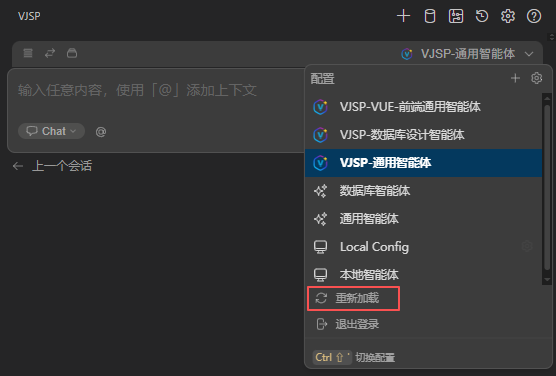
⚠️ Important Note: After clicking “Use Now” on a cloud-based agent on the website, you must manually click the 【Reload】 button in your local VJSP plugin to synchronize and activate the agent.
1. Using Public Agents
Public agents are pre-configured agents officially released by VJSP and available for all users. They’re ideal for quick testing, learning, or direct integration into personal workflows.
Associating a Public Agent
⚠️ Prerequisite: Ensure you are logged in and have the VJSP plugin enabled.
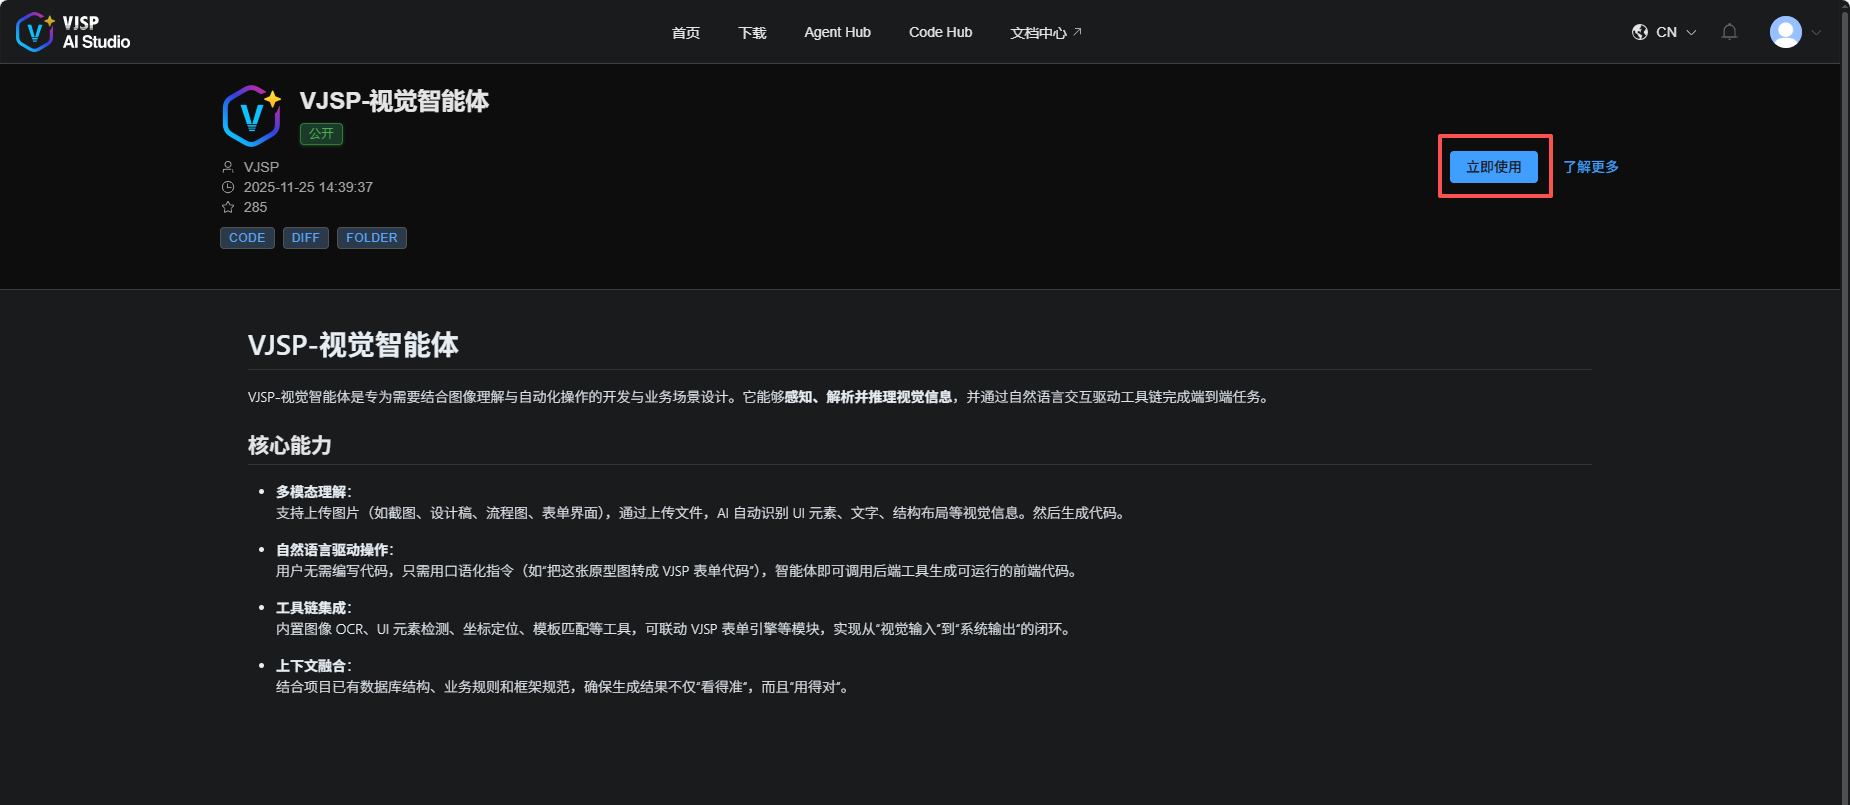
- Visit the official Agent Hub page.
- Browse available agents (e.g., “VJSP-Database Design Agent”).
- Click on the desired agent card, then click 「Use Now」 on the agent detail page.
- Return to your IDE plugin and click 「Reload」 to sync the agent.
Select the agent in the plugin to start using it immediately.
2. Creating and Using a Cloud-Based Agent
Create a private agent on the VJSP AI Studio platform for your personal use only—without embedding it into any external website. Perfect for customizing an agent to fit your specific requirements.
Step-by-Step Workflow
⚠️ Prerequisite: Ensure you are logged in and have the VJSP plugin enabled.
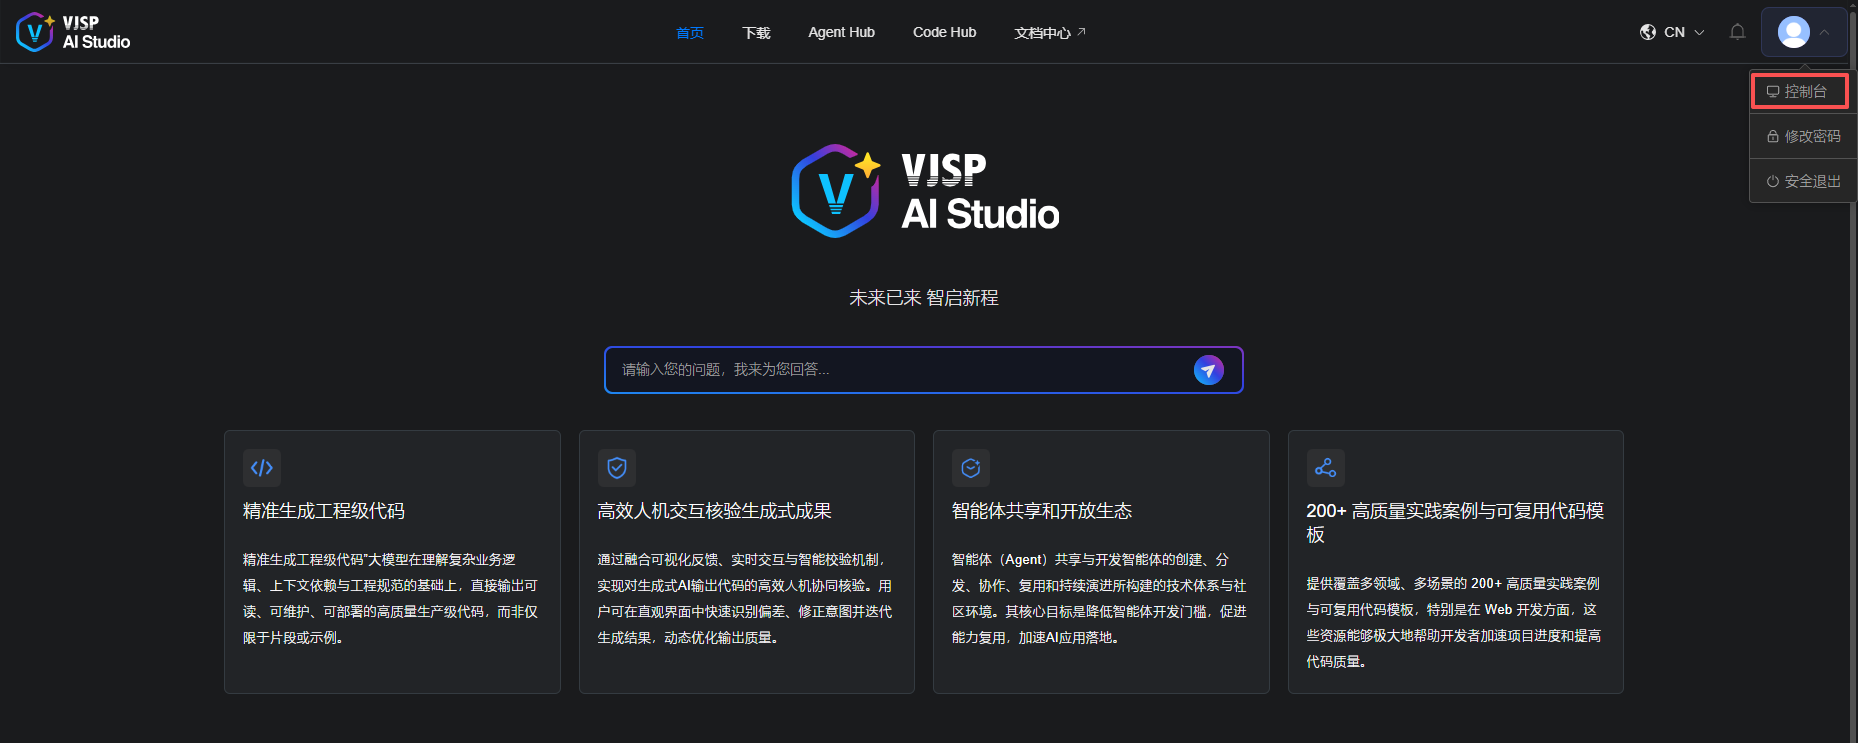
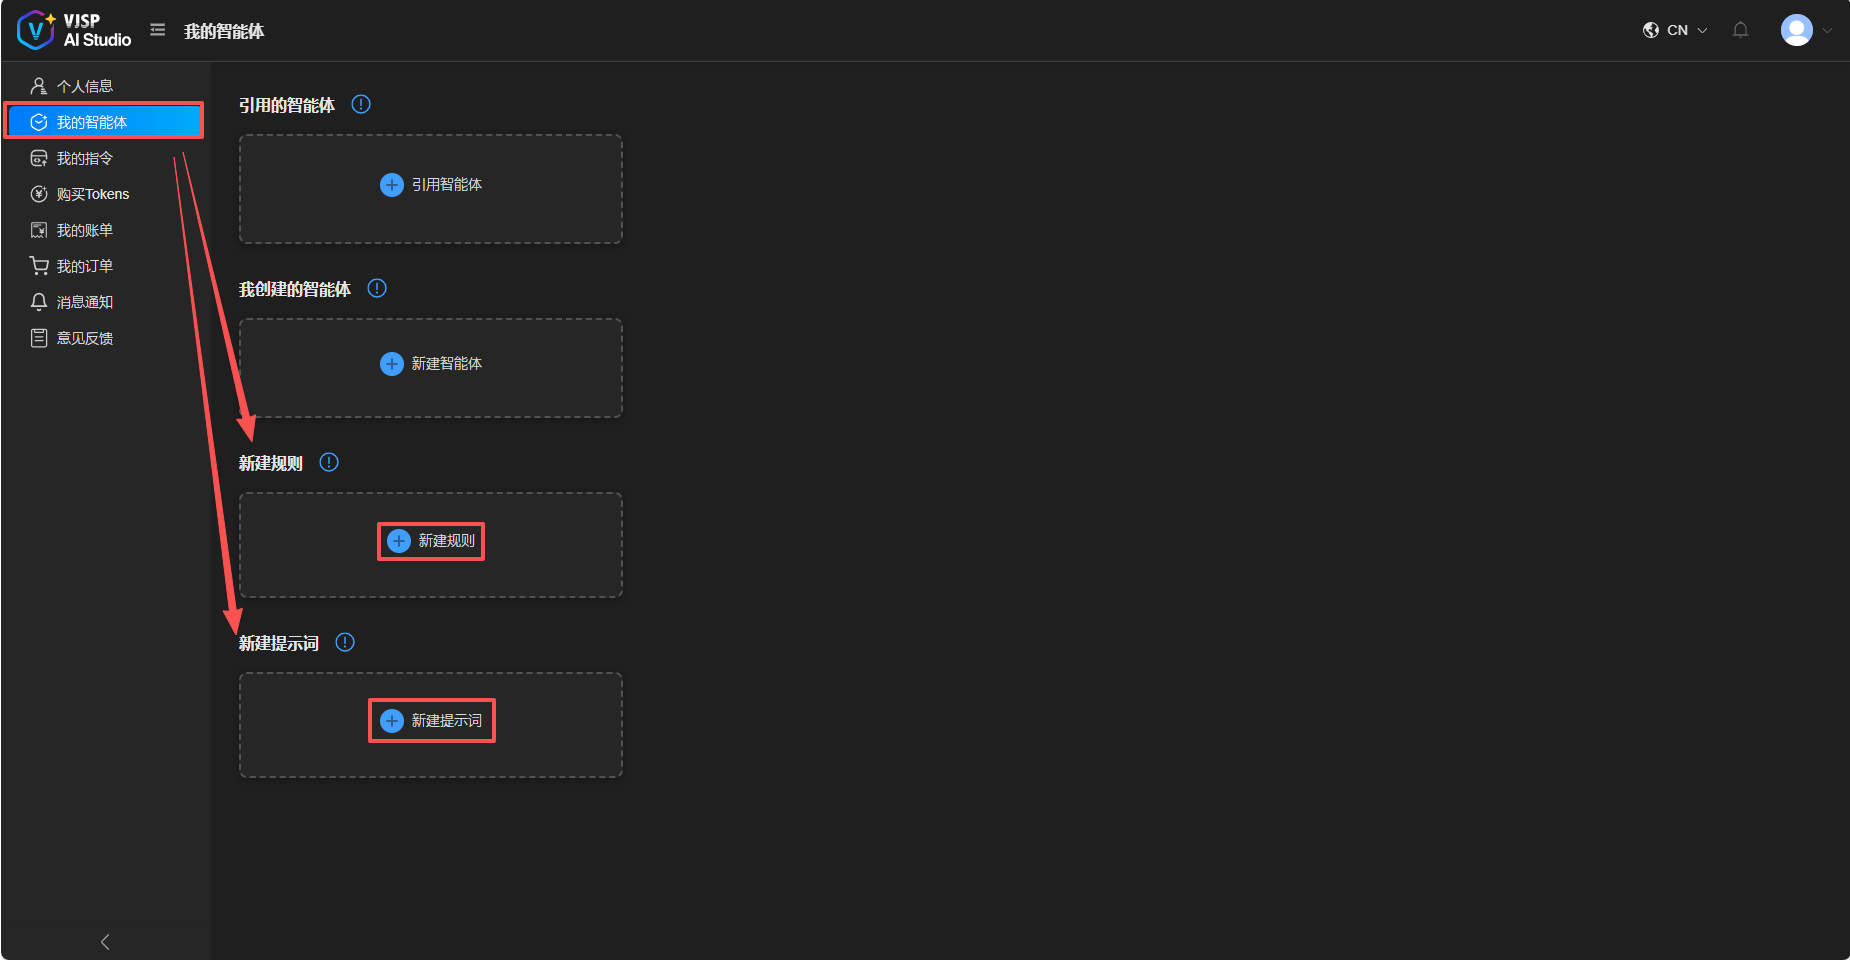
- Go to the VJSP AI Studio website, log in, and enter the console.
- On the “My Agents” page, click 「Create New Agent」 to configure your custom agent.
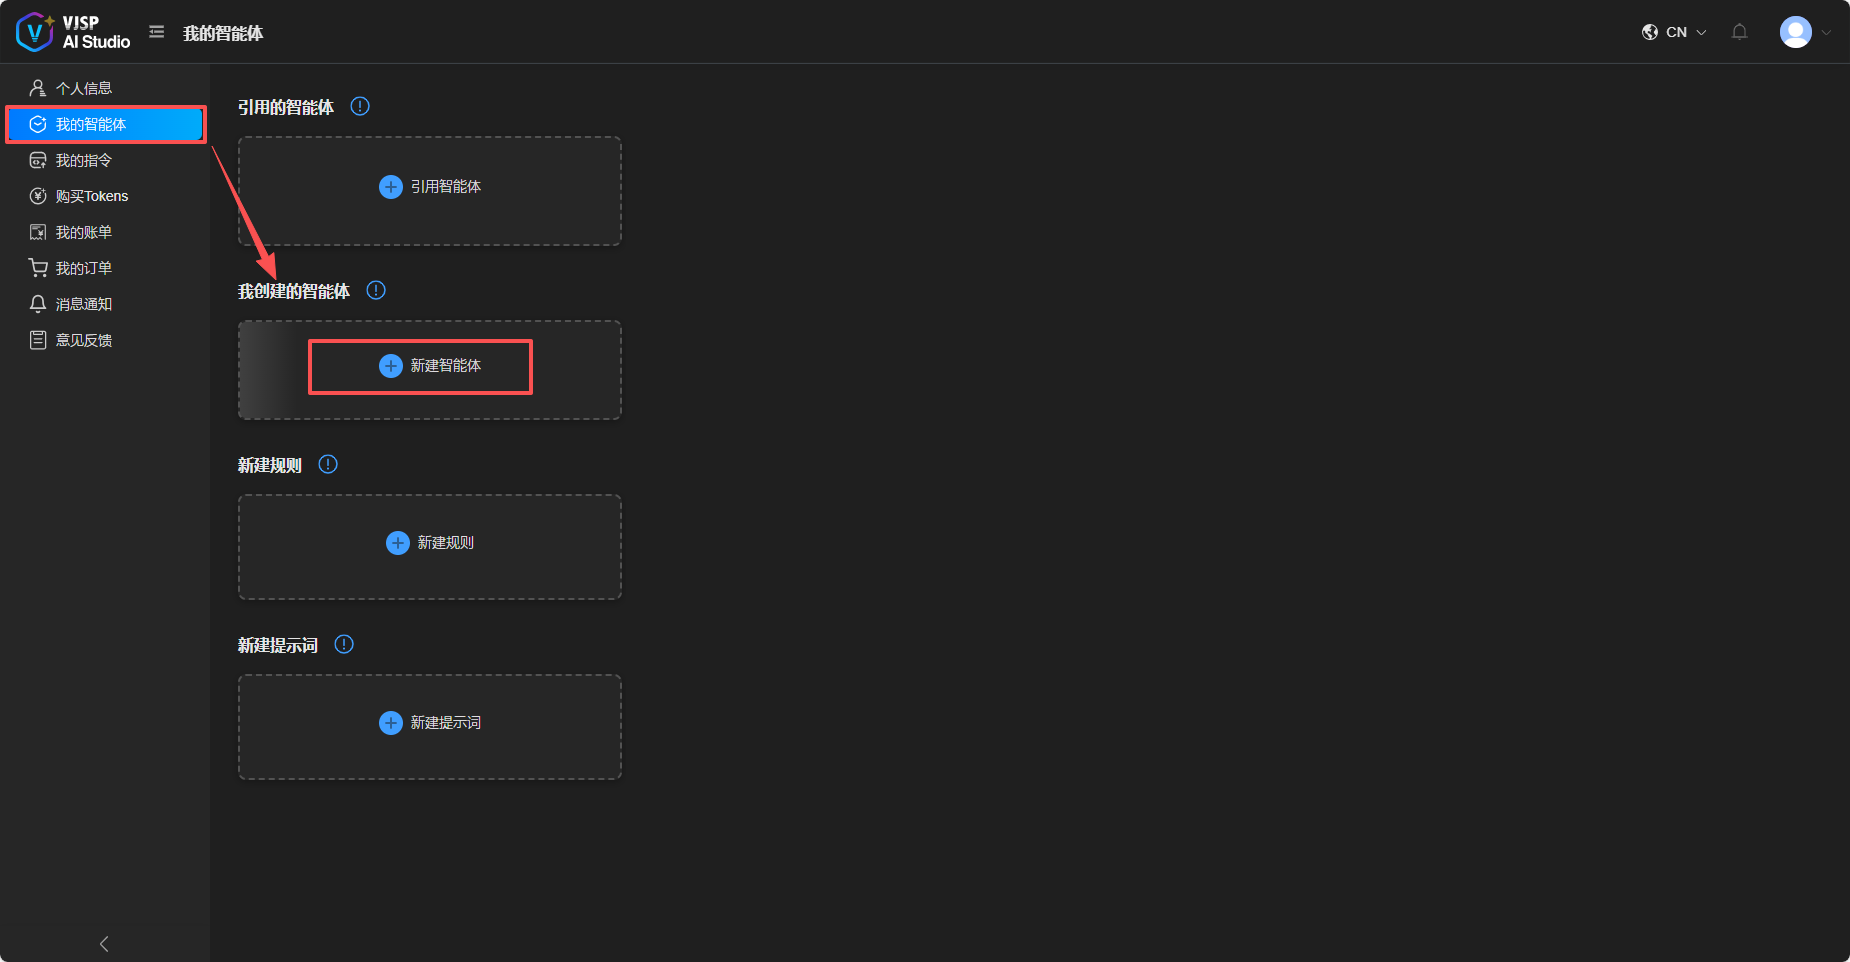
Note: The “Rules” and “Prompts” linked to your agent can be selected from the Agent Hub or created directly on the “My Agents” page.
- After creation, return to your IDE plugin and click 「Reload」 to fetch the new agent.
Select it in the plugin to begin using it.
3. Configuring and Using a Local Agent
⚠️ Prerequisite: Ensure you are logged in and have the VJSP plugin enabled.
Step-by-Step Workflow
1. Open the Agent Management Panel
- In your IDE, open the Agent Management panel.
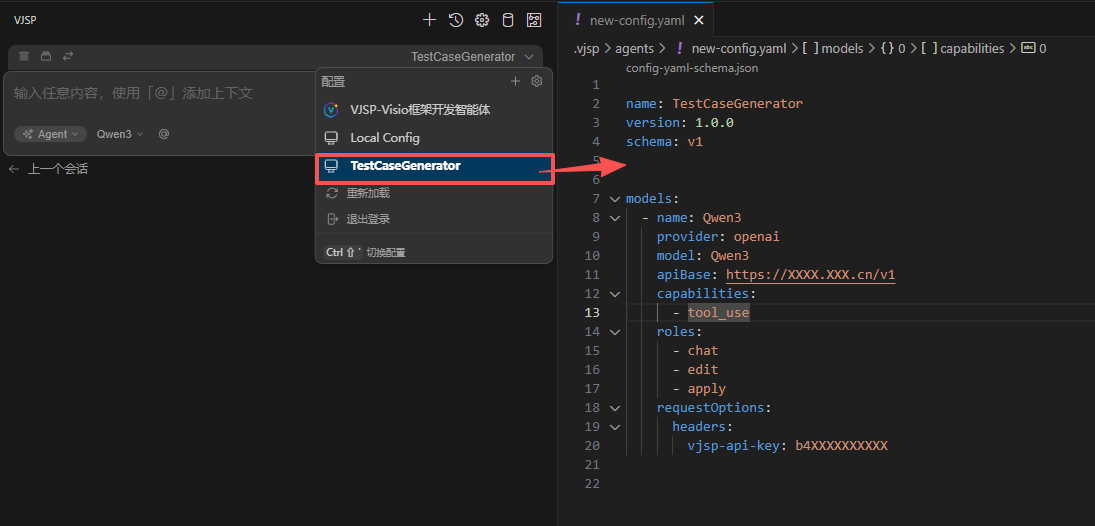
- Navigate to Settings → Configuration → Add Configuration.
- The system will automatically create a
.vjsp/config.yamlfile in your project root directory.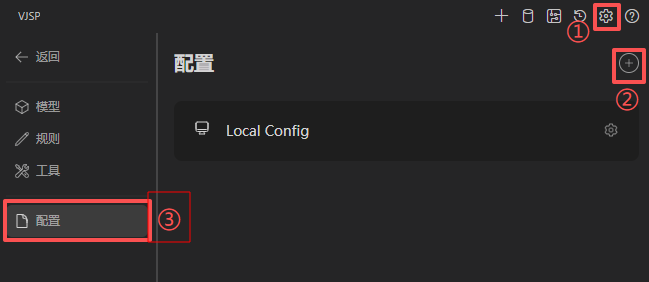
2. Configure Basic Agent Information
2.1 Edit the config.yaml file to define agent metadata and model settings. Example:
name: TestCaseGenerator
version: 1.0.0
schema: v1

models:
  - name: Qwen3
    provider: openai
    model: Qwen3
    apiBase: https://xxx.xx.cn/v1
    capabilities:
      - tool_use    # Enables tool calling (required for MCP)
    roles:
      - chat        # Supports chat mode
      - edit        # Supports edit mode
      - apply       # Supports applying generated results
    requestOptions:
      headers:
vjsp-api-key: b4xxxxxx2.2 📌 Configuration Field Reference
| Field | Description | Notes |
|---|---|---|
capabilities: [tool_use] | Enables function/tool calling; required for MCP tools | Mandatory |
roles | Defines supported interaction modes | Combine multiple as needed |
apiBase | Base URL of the LLM API endpoint | Adjust per your deployment |
vjsp-api-key | Authentication key for API access | Keep secure |
3. Configure Core Components (Critical Step)
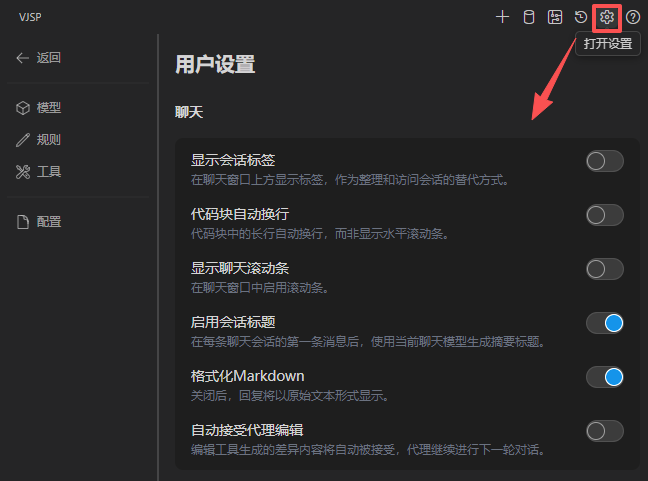
User Settings: Global plugin preferences (font size, code formatting, auto-wrapping, etc.)
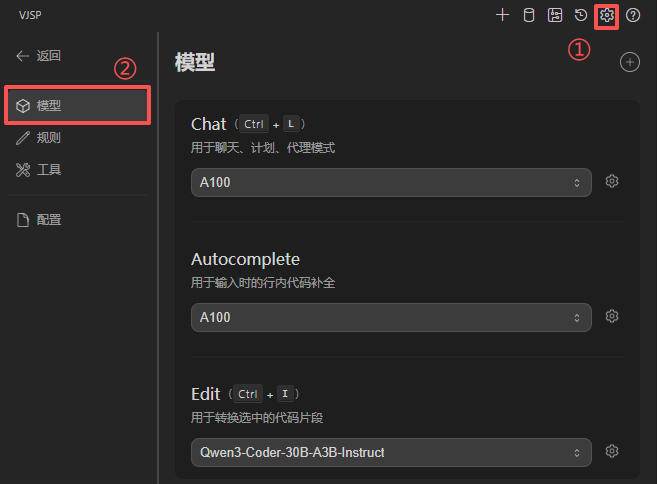
Model Configuration: Assign specific LLMs to different modes (chat, edit, autocomplete, etc.)
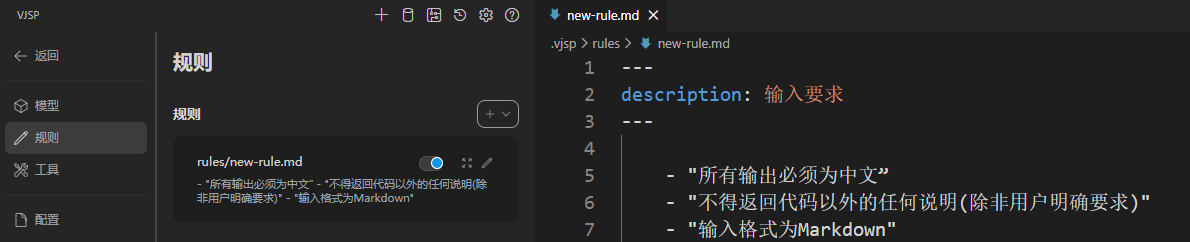
Rules: Enforce coding standards or behavioral constraints
Prompts: Define task templates triggered by
/commands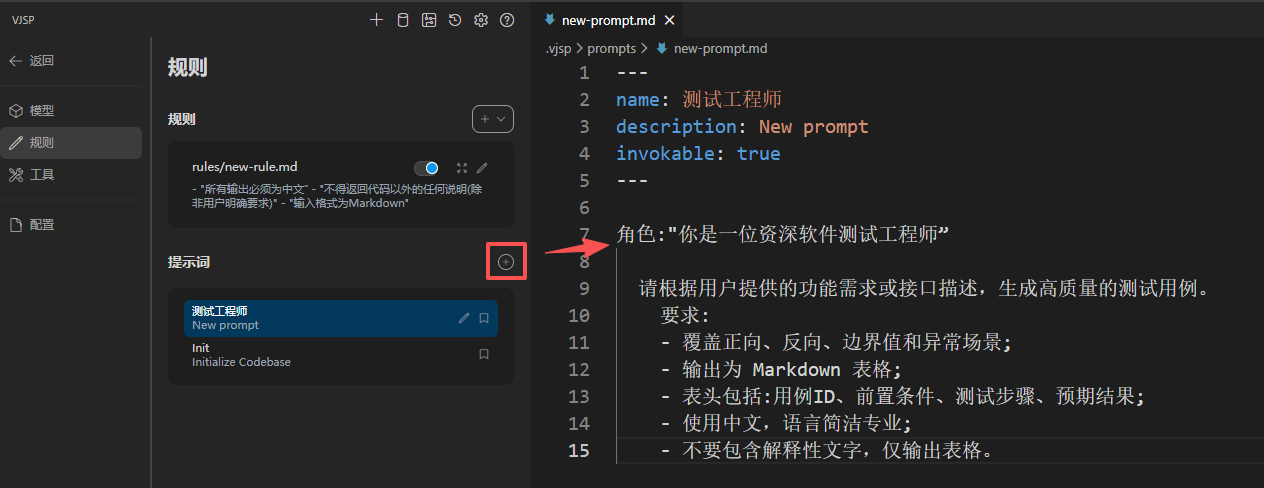
Tool Integration: Connect external capabilities (databases, APIs, CLI tools, etc.) via MCP
4. Activate the Agent
- Save all configuration files.
- Click 「Reload」 in the IDE to refresh the agent list.
- Switch to your newly created local agent in the chat window header.
You’re now ready to use it.
Important Notes
🔒 Scope Limitation: Local agents are project-scoped only and will not sync automatically to the web platform.
🔄 Activation Requirement: Any configuration change requires a manual reload to take effect.
💡 Reusability Tip: If you need the same agent across multiple projects, consider creating it on the Agent Hub instead of locally.