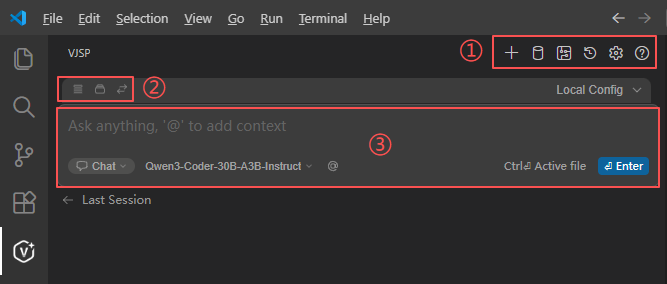
Interface Overview
Layout Summary
The VJSP interface features a clean and intuitive layout, primarily divided into four functional areas:
- Top Function Bar
- Operation Options Panel
- Interaction Input Area
- Conversation History Panel
Each area serves a distinct purpose, enabling users to quickly get started and operate efficiently.
Detailed Area Functions
1. Top Function Bar
Located at the very top of the panel, this bar provides quick access to core features:
- “+” (New Chat): Start a fresh conversation thread.
- History Icon: View past conversations for reference or reuse.
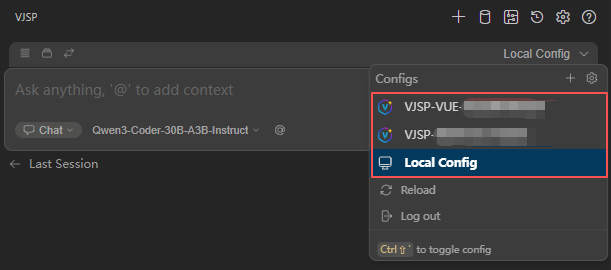
- Settings Icon: Open settings to customize plugin behavior.
- Database Icon: Launch the visual Database Designer for schema management and SQL operations.
- Workflow Icon: Open the Workflow Designer to create, edit, or inspect project workflows for multi-step automation.
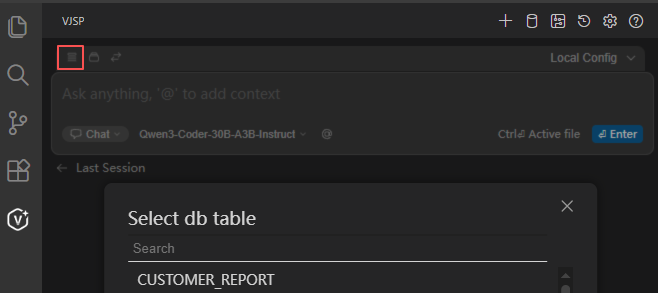
2. Operation Options Panel
This section offers contextual tools to enhance AI interactions:
Select Database Table Icon:
Enables AI to reason based on real table structures.- a. Click the Database icon to see connected databases.
- b. Select a table → its schema is automatically injected into the AI context.
Select Workflow Icon:
Choose an existing project workflow to guide AI code generation (e.g., for form or API development aligned with process logic).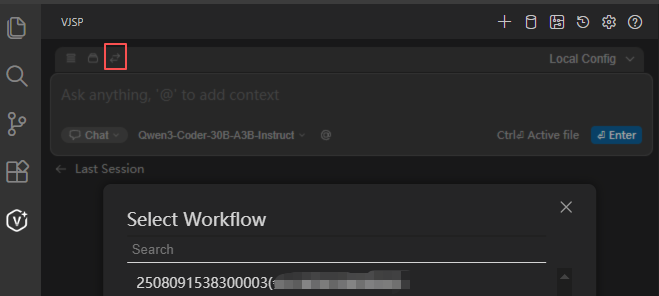
Note: Rules, Tools, and Models configuration options are managed via the Agent Hub or local
config.yamland are not directly exposed as icons in the current UI.
3. Interaction Input Area
This is the primary zone for user–AI communication:
Input Box
- Type natural language requests, questions, or instructions.
- Press
@(or click the @ button) to attach contextual references:- Files: Reference specific project files.
- Code: Use currently selected code as context.
- Git Diff: Include version differences for targeted suggestions.
- Folder: Provide directory-level context.
- Current File: Use the entire open file as context.
- Terminal: Incorporate terminal output or commands.
- Problems: Feed compiler errors/warnings for auto-fixing.
- Rules: Apply custom coding rules during generation.
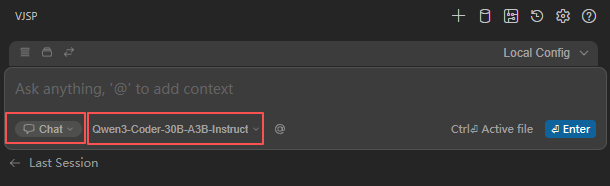
Mode Selector (Agent Dropdown)
Switch between interaction paradigms:
- Chat Mode: Free-form dialogue for exploratory tasks.
- Plan Mode: Read-only analysis—ideal for design reviews.
- Agent Mode: Executable actions—AI can apply changes directly to your codebase.
Model Selector
- Choose from configured AI models (defined in your agent setup).
- Different models offer varying strengths in code understanding, generation speed, and reasoning depth.
Additional UI Elements
- “file” badge: Indicates you can press
Ctrl+J(orCmd+Jon macOS) to auto-attach the active file as context. - “Enter” button: Submit your input (same as pressing Enter).
- Agent Selector: Choose a pre-configured or custom agent tailored to your task (e.g., “Database Expert”, “Vue Frontend Specialist”).
4. Visual Tools
VJSP integrates powerful visual editors for key development artifacts:
4.1 Database Visualization
Browse tables, generate SQL via natural language, and execute queries—all within the IDE.
4.2 Form Visual Editing
Drag-and-drop WYSIWYG form builder with real-time HTML sync.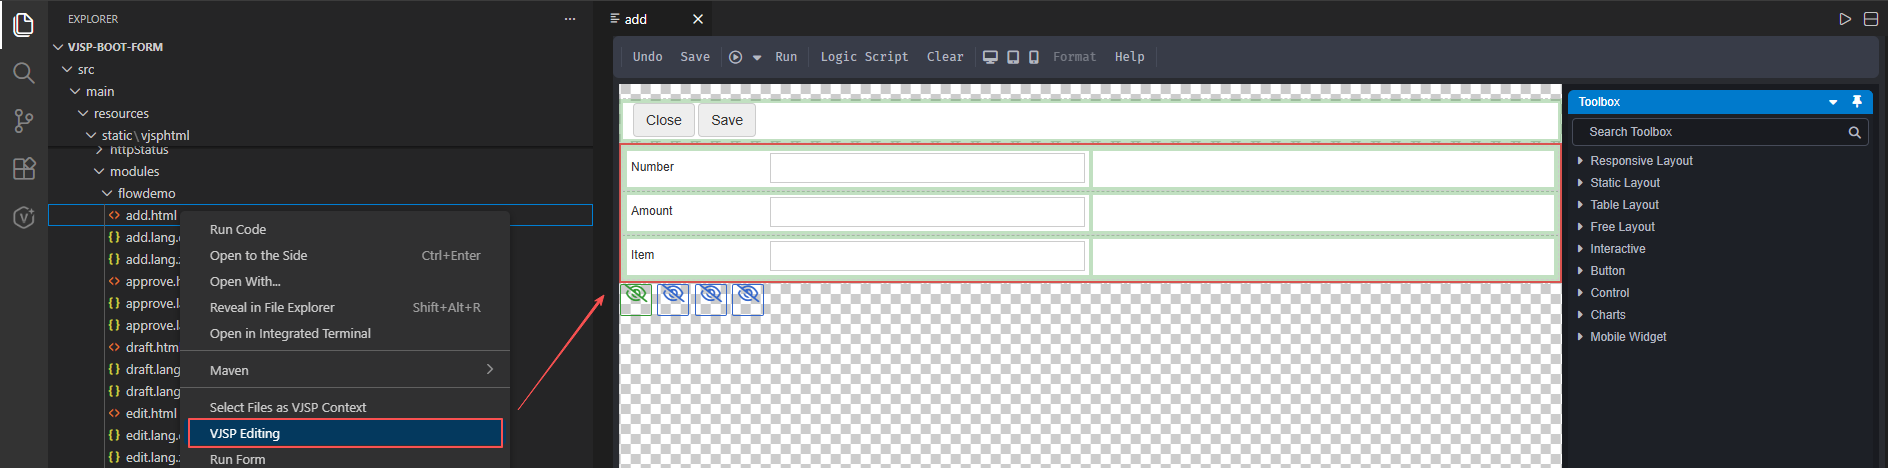
4.3 Workflow Visualization
Graphically design and inspect business processes with node-level configuration.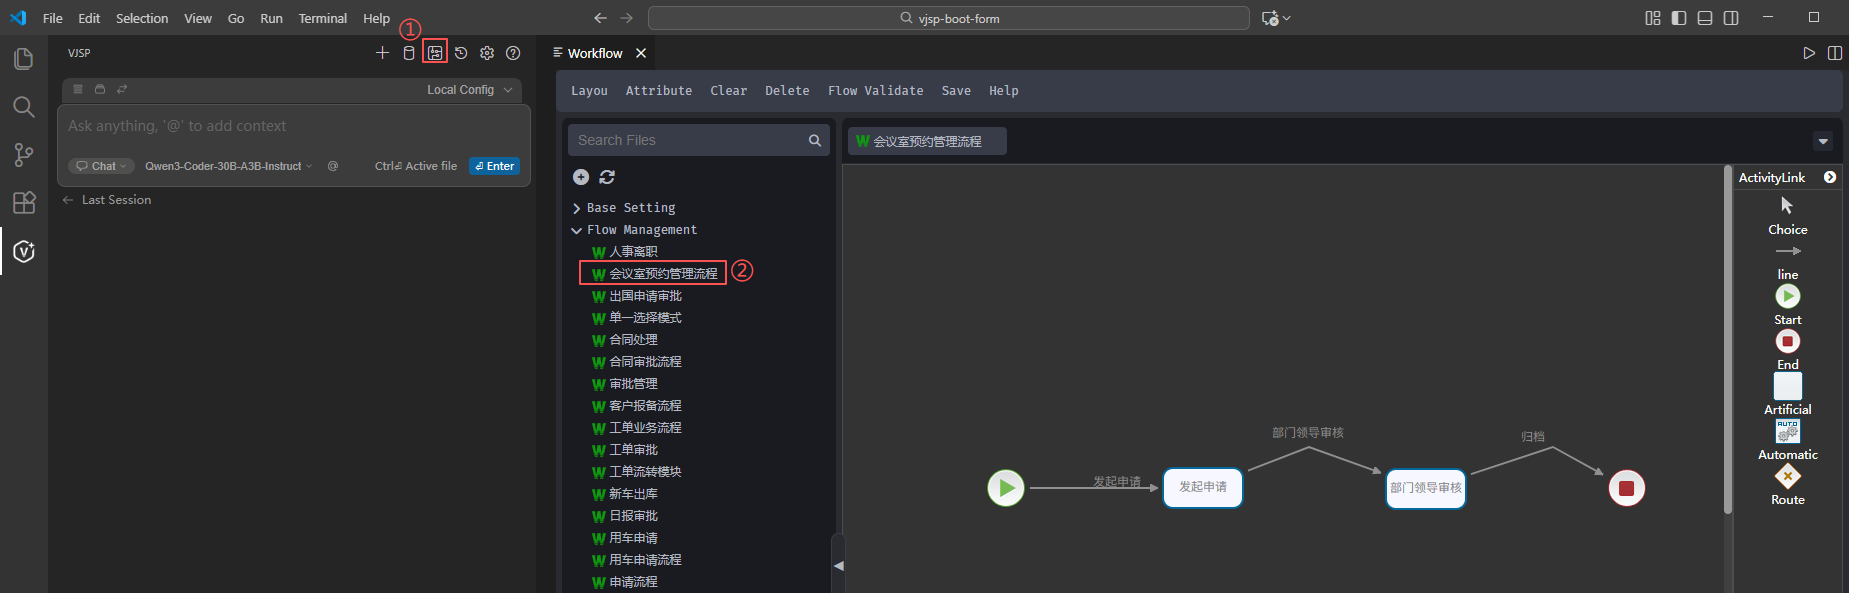
4.4 Command Center
Click the Command Center button to access a library of preset prompts (e.g., “Generate CRUD API”, “Write unit tests”). One click triggers complex AI actions without typing full instructions.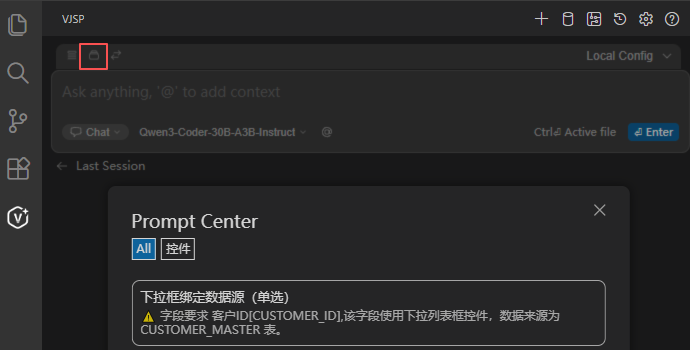
5. Multi-Agent Collaboration System
VJSP leverages a team of specialized AI agents, each with a defined role:
Clear Role Division:
- Frontend Agent: Handles UI components and event logic.
- Backend Agent: Manages APIs, business rules, and validation.
- Database Agent: Ensures optimal schema design and query performance.
Shared Context: All agents operate on the same project metadata (forms, tables, workflows), preventing inconsistencies.
Cross-Validation: Critical outputs are generated by multiple agents and reconciled for higher accuracy.
Custom Local Agents
When built-in agents aren’t enough, you can create custom agents:
- Define unique roles (e.g., “Compliance Auditor”, “IoT Protocol Handler”)
- Inject domain-specific knowledge (internal APIs, style guides)
- Enforce custom rules (output format, tool usage, security constraints)
💡 Tip: Custom agent configurations are stored in
.vjsp/agents/under your project root for easy version control and sharing.
Result Handling & Interaction
After AI generates a response, you can efficiently manage it using these actions:
1. Quick Reuse
- Quote: Auto-fill the reply into the input box for follow-up.
- Insert Code: Place code directly at the current cursor position.
- Copy: Copy text or code to clipboard.
2. Safe Application
- Click Apply → a confirmation dialog appears:
- ✅ Confirm: Write changes to your project
- ❌ Cancel: Discard safely
3. Conversation Optimization
- Collapse: Hide verbose responses, keep only essentials.
- Save as Rule: Convert a successful interaction into a reusable rule.
4. Feedback & Management
- Delete: Remove unwanted messages.
- 👍 / 👎 (Thumbs Up/Down): Rate response quality to help improve the AI over time.
All actions are accessible via clearly labeled buttons—no manual copy-paste needed—maximizing coding efficiency and user experience.