Edit Form
After generating the form, you can directly modify it in the designer without having to re-generate the code. Once modified, the corresponding code will also be automatically synchronized.
Adding Controls
Select controls from the toolbox on the right side and drag them into the form editing area on the left to add them.
Example: Add a text input field to the form.
Steps as follows: Choose the '6+6 Grid Layout' from the responsive layout options in the toolbox, select the ‘Text Input’ control, and drag it into the form editing area. See the image below for a visual reference: 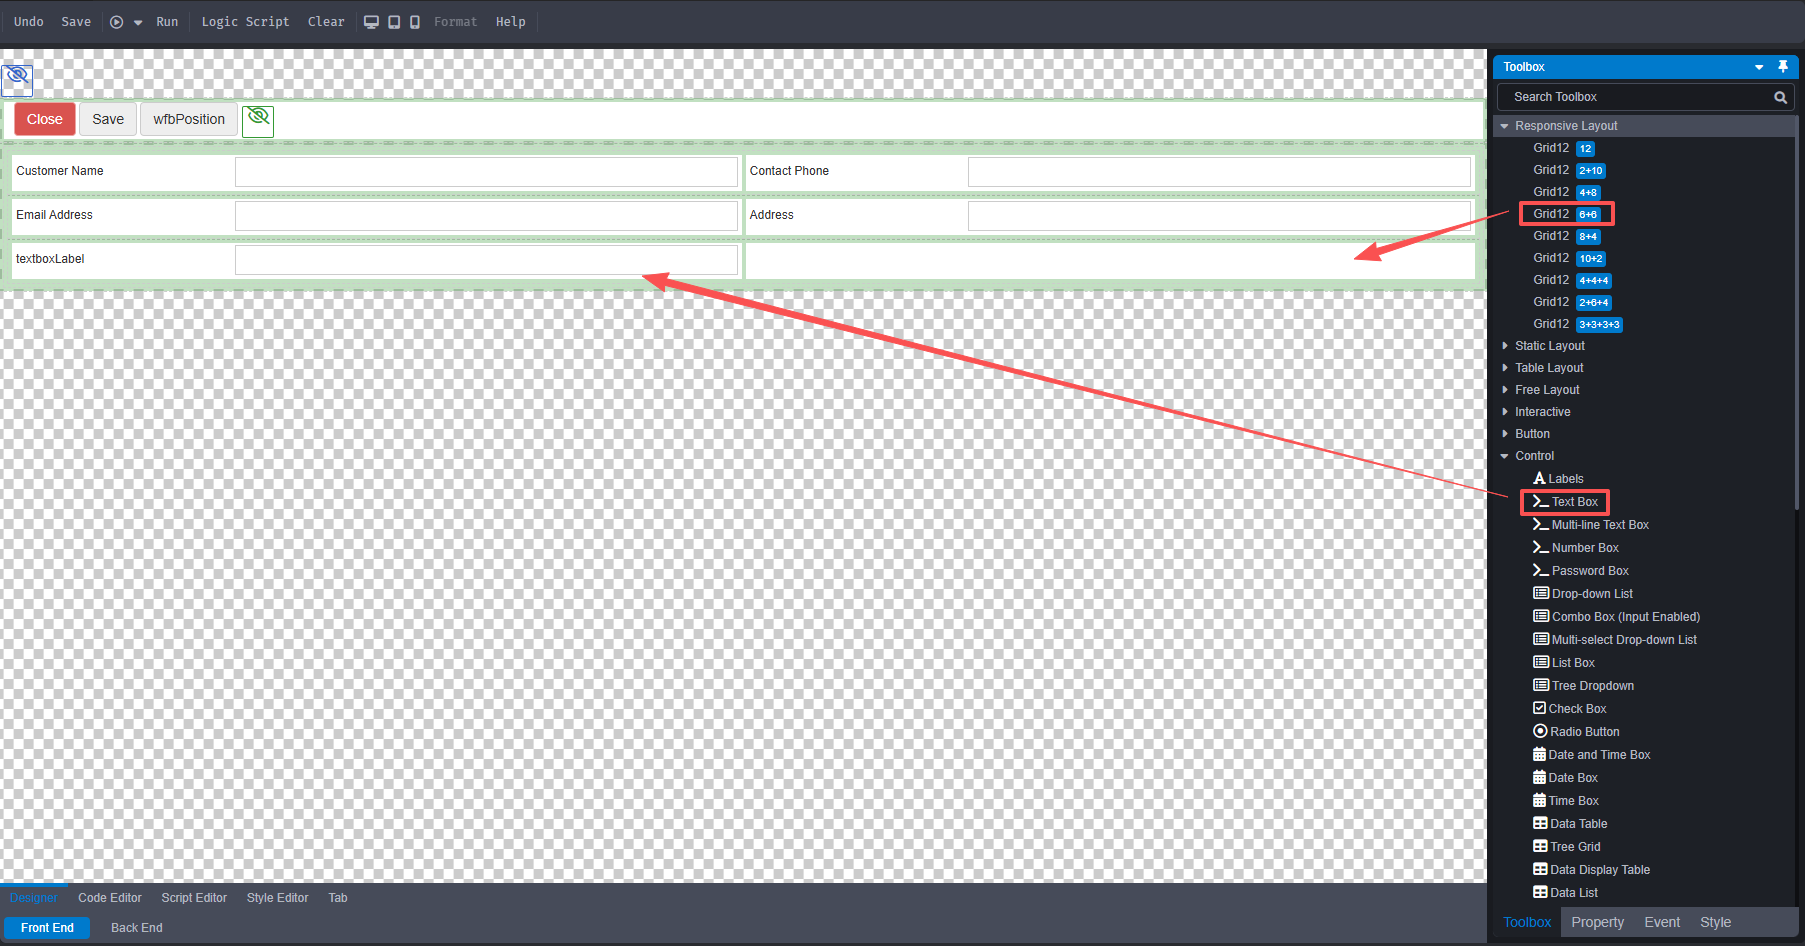
After editing, click [Save] to save the settings.
Setting Field Properties
Select the control in the editing area and configure the control's properties, style, and permission settings.
Example: Change the label text from 'Text Input' to 'Sales Representative' and set the background color to gray.
Steps as follows: Click on the label to open the property panel on the right. Change 'Text Input' to 'Sales Representative' in the text field, then apply a gray background color under the style settings. A visual representation of this is shown in the image below: 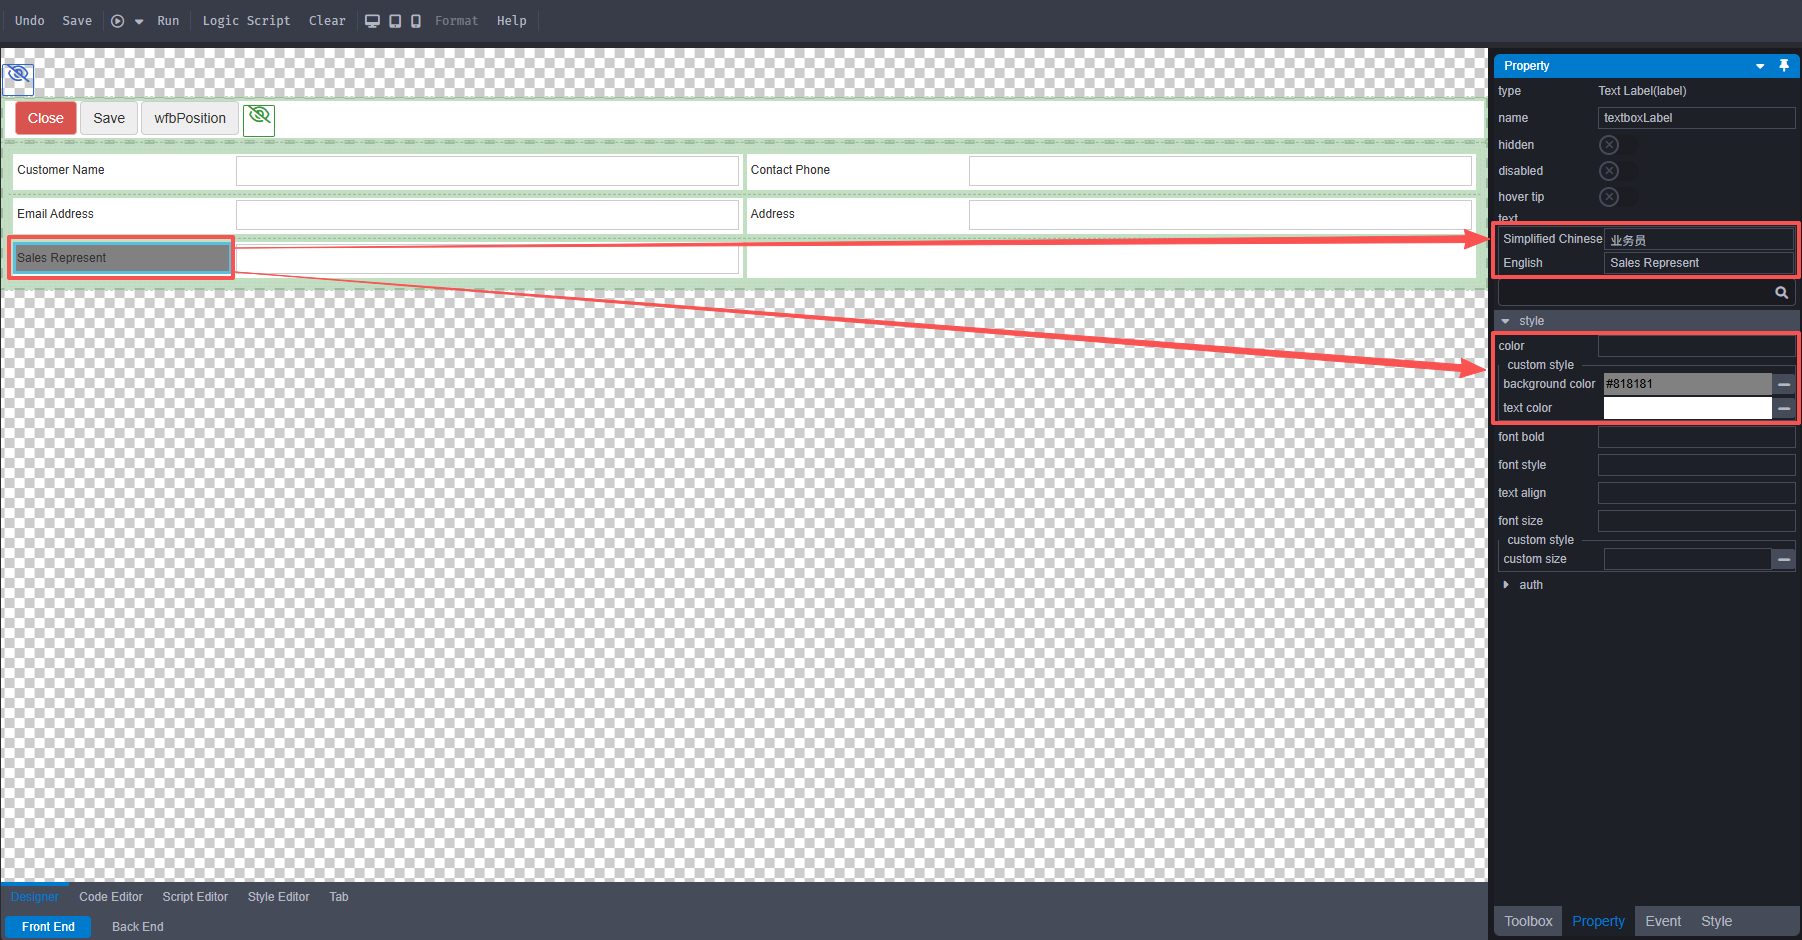
After setting the modifications, click [Save] to save the changes.
Code Synchronization
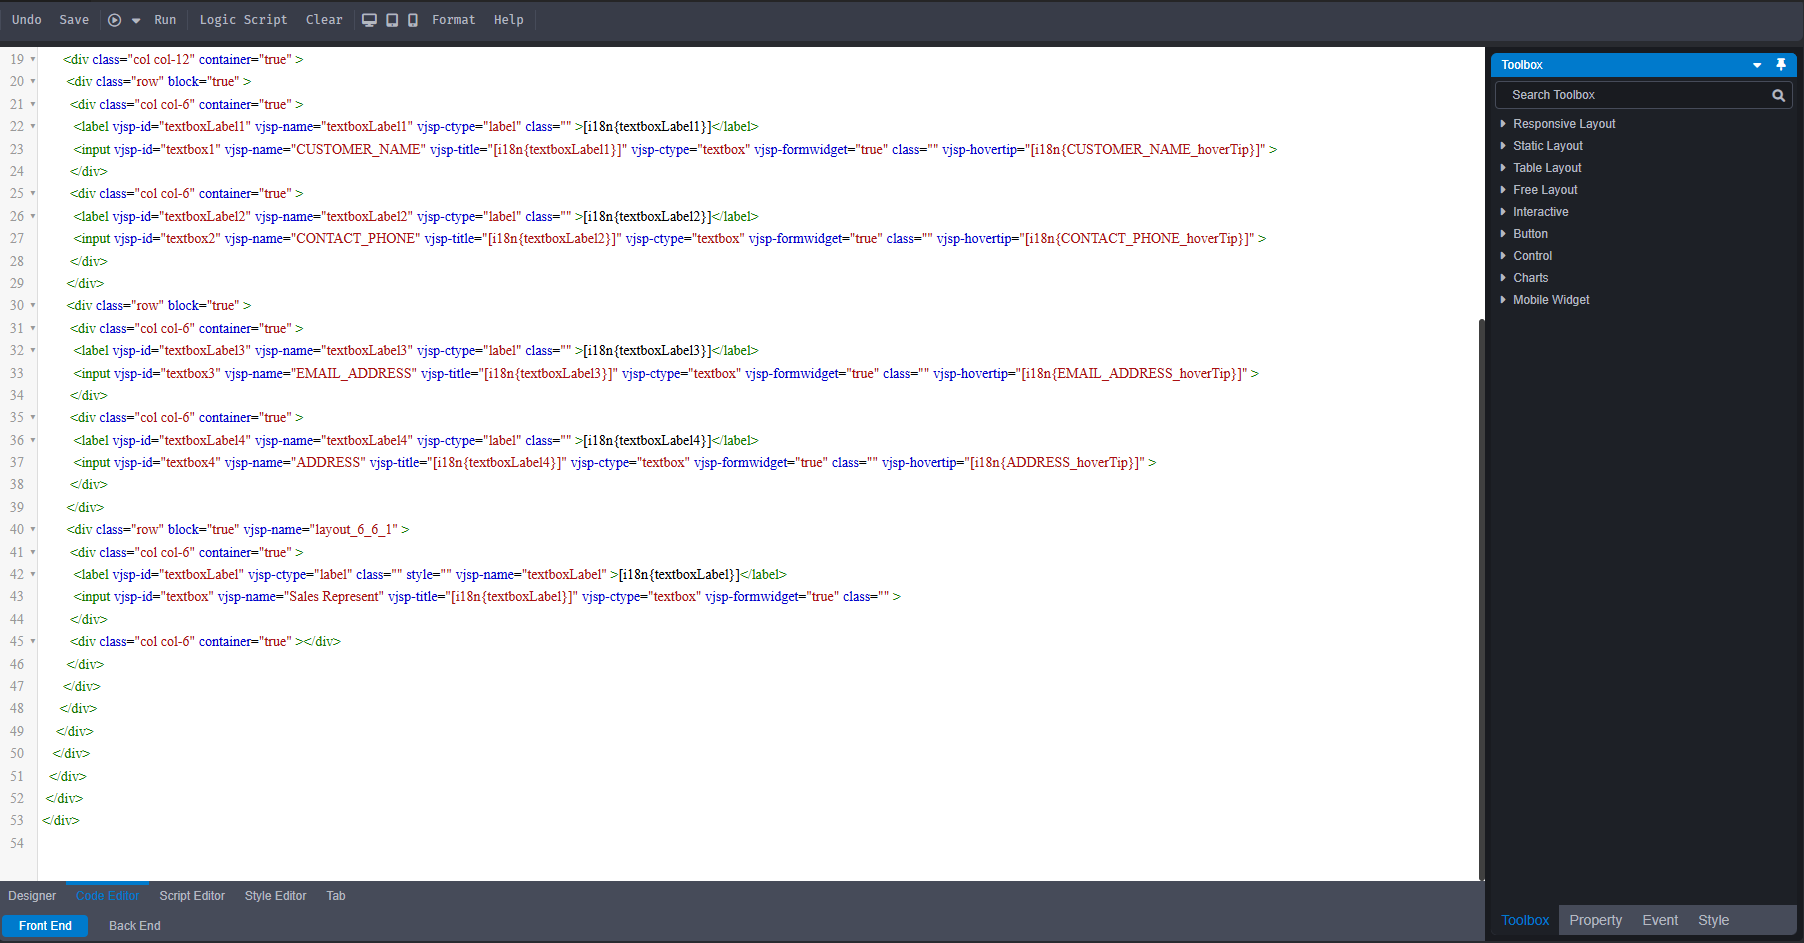
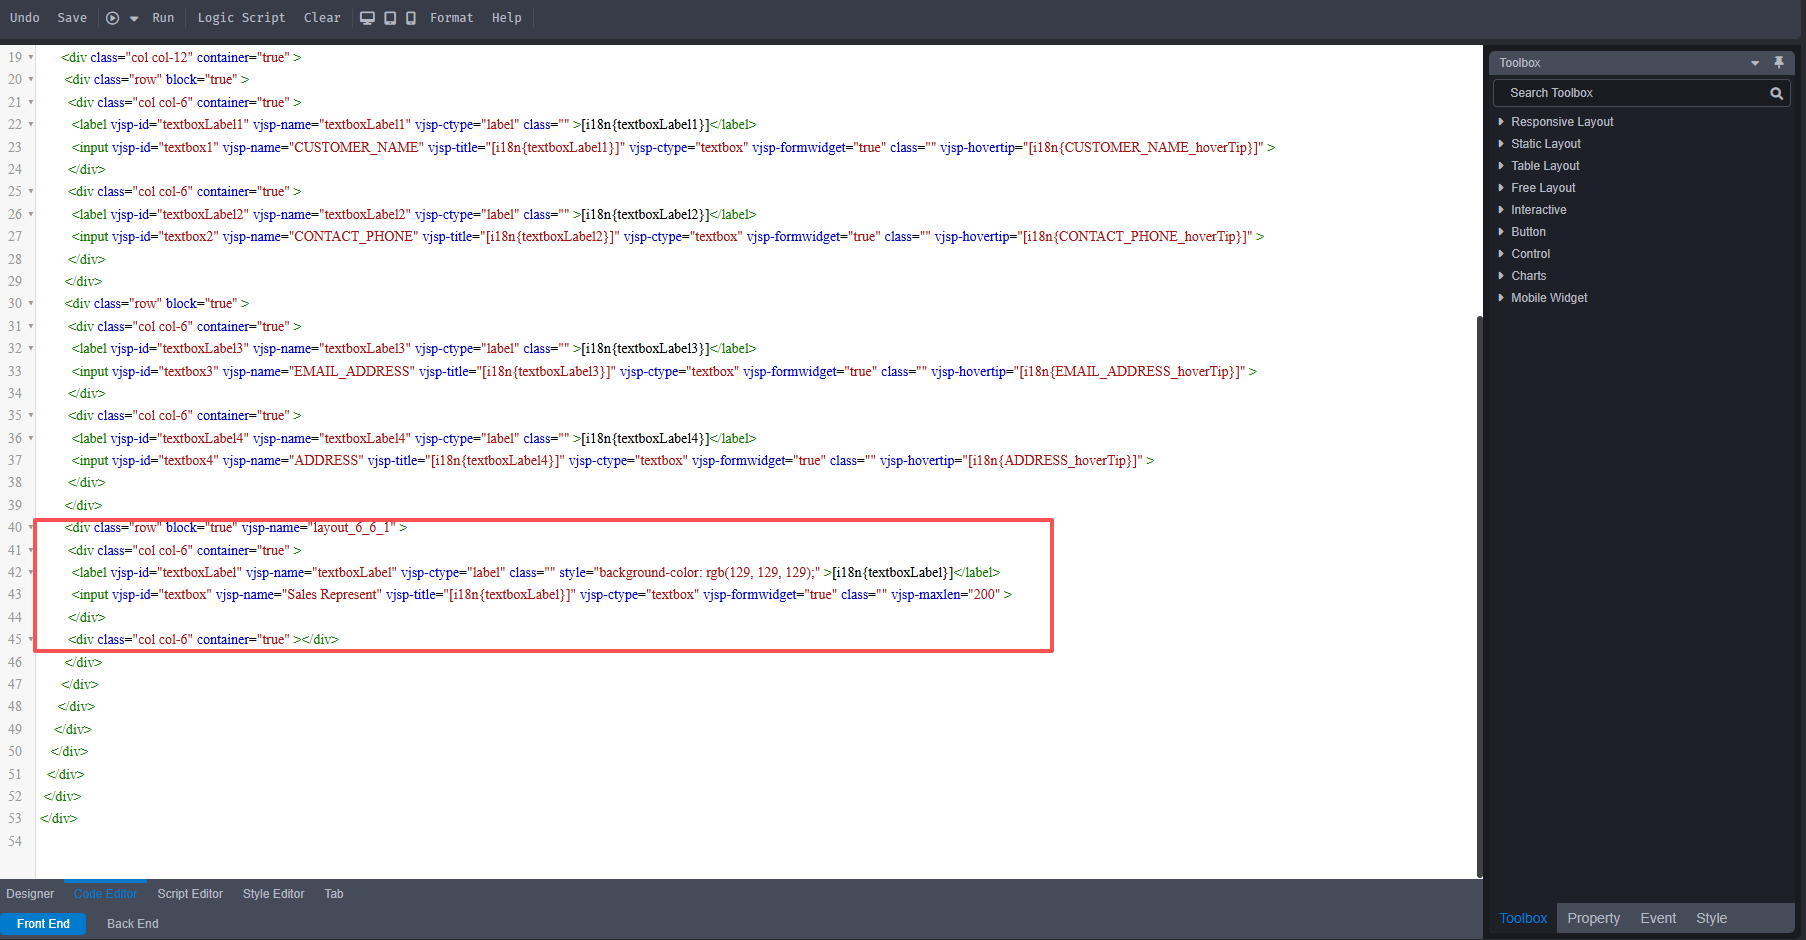
The designer features an automatic real-time synchronization mechanism: any modifications made to the form using the designer are instantly updated in the code. For example, refer to the comparison images below to see how code changes appear after adding a new field.
Example: Add a text box named ‘Sales Representative’ with a maximum character limit of 200.
Backend Logic
Click on the backend to enter backend editing mode. In the “Submit Action” section, choose an event to edit its corresponding editor. Within the editor, drag and drop components from the toolbox to the appropriate locations to finish building the backend logic. See the image below for the result of such editing: