Generate Commit Messages
Automatically generate descriptive commit messages based on your staged Git changes. VJSP analyzes your staged files and creates conventional commit messages that follow best practices.
ⓘ Note
This feature analyzes only staged changes. Be sure to stage your files using git add or through your IDE’s interface before generating a commit message.
How It Works
The Git commit message generator:
- Analyzes only your staged changes (unstaged or untracked files are ignored)
- Uses AI to understand the context and purpose of the changes
- Creates descriptive commit messages that explain what changed and why, following the Conventional Commits specification (customizable by default)
Using the Feature
Generate a Commit Message
- Stage your changes using
git addor your IDE’s Git interface - In your IDE’s Source Control panel, locate the VJSP logo next to the commit message field
- Click the logo to generate a commit message
The generated message will appear in the commit message field, where you can review and edit it as needed.

Conventional Commits Format
By default, generated messages follow the Conventional Commits specification:
<type>(<scope>): <description>
<body>Common types include:
feat: A new featurefix: A bug fixdocs: Documentation changesstyle: Code style changes (formatting, etc.)refactor: Code refactoringtest: Adding or updating testschore: Maintenance tasks
Configuration
Custom Commit Templates
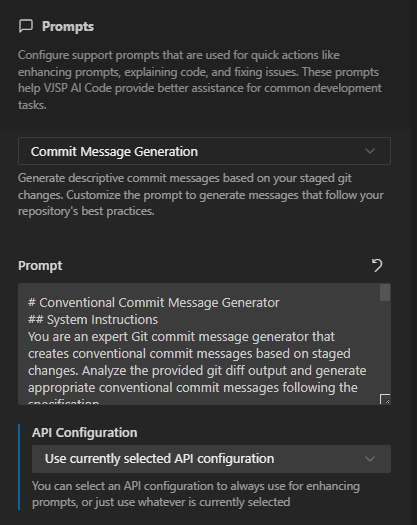
You can customize how commit messages are generated by modifying the prompt template:
- Click the gear icon ⚙️ to open Settings →
Prompts - Locate the “Commit Message Generation” section
- Edit the prompt template to match your project’s conventions
The default template produces Conventional Commits, but you can modify it to:
- Use a different commit message format
- Include project-specific information
- Enforce your team’s commit message guidelines
- Add custom instructions for the AI
API Configuration
You can configure which API profile is used for commit message generation:
- In the Prompts settings, scroll to “API Configuration”
- Select a specific profile or use the currently selected one
💡 Tip
Consider creating a dedicated API configuration profile with a faster, more cost-effective model specifically for commit message generation.
Best Practices
Staging Strategy
- Stage related changes together to produce more coherent commit messages
- Avoid staging unrelated changes in a single commit
- Use
git add -pfor partial file staging when needed
Message Review
- Always review the generated message before committing
- Edit the message to add context the AI might have missed
- Ensure the message accurately describes the changes
Custom Templates
- Tailor the prompt template to your project’s needs
- Include project-specific terminology or conventions
- Add instructions for handling specific types of changes
Example Generated Messages
Here are examples of messages this feature might generate:
feat(auth): add OAuth2 integration with Google

Implement Google OAuth2 authentication flow including:
- OAuth2 client configuration
- User profile retrieval
- Token refresh mechanismfix(api): resolve race condition in user data fetching
Add proper error handling and retry logic to prevent
concurrent requests from causing data inconsistencydocs(readme): update installation instructions
Add missing dependency requirements and clarify
setup steps for new contributorsTroubleshooting
No Staged Changes
If the button doesn’t appear or generation fails, ensure you’ve staged changes:
git add <files>
# or stage all changes
git add .Poor Message Quality
If the generated message isn’t helpful:
- Review your staging strategy—avoid grouping unrelated changes
- Customize the prompt template with more specific instructions
- Try a different AI model via API configuration
Integration Issues
This feature integrates with your IDE’s built-in Git functionality. If you encounter issues:
- Ensure your repository is properly initialized
- Verify that your IDE can access your Git repository
- Confirm that Git is installed and accessible from your IDE
Related Features
- API Configuration Profiles – Use different models for commit message generation