Installing the VJSP Plugin in VS Code
This guide describes how to install and enable the VJSP plugin in VS Code.
Prerequisites
- Operating System: Windows 10/11, macOS, or UOS
- Development Environment: VS Code 1.84 or later installed
Installing the VJSP Plugin
Online installation via the VS Code Marketplace is recommended. You may also install manually using the .vsix package.
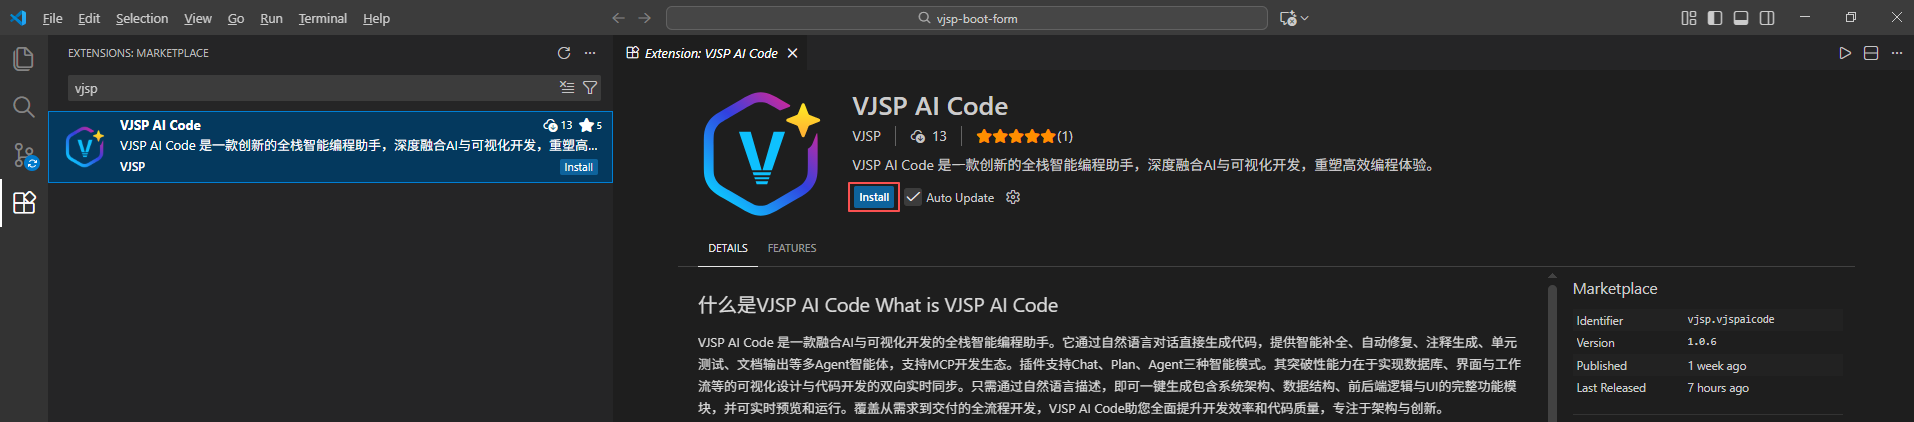
Method 1: Install from the Extension Marketplace (Recommended)
- Open VS Code and click the Extensions icon on the left (or press
Ctrl+Shift+X/Cmd+Shift+X). - Enter
VJSPin the search box. - Locate the VJSP plugin in the search results and click the Install button to complete installation.
Once installed, you can open the panel via the VJSP icon in the sidebar.
Method 2: Install via the Marketplace Website
- Go to the ⬇VS Code Marketplace Download Page and click “Install”.
- Follow the prompts to open VS Code, go to the Extensions Marketplace, and click the Install button to finish installation.
Logging In and Enabling the VJSP Plugin
After installation, you must complete account authentication to use all AI features.
- Click the VJSP icon in the VS Code sidebar.
If the icon does not appear, right-click an empty area in the sidebar and check VJSP to enable the entry.
- In the VJSP panel, click the “Log In” button to start the login process.
- The system will automatically open the VJSP login page in your default browser.
- Complete your VJSP account login in the browser.

- After logging in, you will be redirected to the authorization page. Click Agree.
- Return to VS Code. The VJSP control panel will automatically display your account information, and you can now use all AI features normally.
The plugin is ready. You may start chatting with VJSP.
Upgrading the Plugin
- Open the plugin to automatically check for new versions.
- If an update is available, click the Update button to upgrade.